TerminalFour (t4) is the University’s content management system (CMS). Before uploading images to t4 for use on the website, they must be correctly sized and at optimal file size.
Below, we outline how this can be done using the University’s preferred image editing software, Affinity Photo.
Installing Affinity Photo
If you’re using a University managed PC, you can install Affinity Photo via the Software Centre in Windows. To do this, you’ll need to be on campus, or by using the University's VPN, if off-campus.
Alternatively, you can download Affinity Photo via Pegasus for Windows or Mac.
For more help on this, please contact the relevant helpdesk for your area.
Editing photos
Depending on the content type you’re using, different photos require different sizes. It’s important to upload the correctly sized photos for two reasons:
- Aesthetics
- Page load speed (too big an image, causes a page to load more slowly, affecting performance)
The steps below outline best practices for optimising images.
1. Check the image size for the content type
Before starting, make sure you know the correct image size for the content type you’re using. You can find the image size via the t4 content types guide on our beta website.
2. Open your image in Affinity
- Select File > Open and browse to the photo you want to edit

3. Resize your Image
- Click on 'Document' in the top menu bar and choose 'Resize Document'.
- Amend the height or width to the correct size. Do not amend both.
- Click the 'Resize' button.
- The width or height which you have just changed will be the correct size but the other dimension will usually not be the desired size yet.
- Make sure the dimension you have NOT amended is larger than the final size required.
- If it is not, then try resizing the dimension which you did not change in step 3.2. If the unchanged dimension is too small then your image may not be suitable for this content type and you would be required to source a different image.
Example one
In this example we want to create an image that is 1600 x 600px, therefore we'll change the width dimension to 1600. This leaves the height as 1063.8px. This is too big for our requirements. (600px)
So, we now need to crop the image. (See step 4)

Example two
In this example we want to create an image that is 600x300px, therefore we'll try changing the width dimension as we did in example one. This leaves the height as 266px. This is too small for our requirements. (300px)

So we now need to undo the change we made and try changing the height dimension first instead.

This leaves a large enough width to crop the image to 600px wide.
4. Crop your Image
- Check the dimensions of your image. In this example, they are 1600 x 1063px. I would like the image to be 1600 x 600px. So I now need to crop the image.

- Select the Crop Tool from the left-hand menu

- From the top menu, select the mode to be Unconstrained
- Type the image dimensions (in pixels) that you need the image to be (such as 1600x600, 600x600, 600x300) and hit the 'Enter' key on your keyboard.

- You will see the cropped area has reduced in size.
- You can then reposition the cropped area to get the most desirable part of the image.
- To do this, move the grid around the image by clicking in the middle of the image until you see the cross cursor
 hold it down and drag it to different parts of the image. This will allow you to select the best section of the image for use.
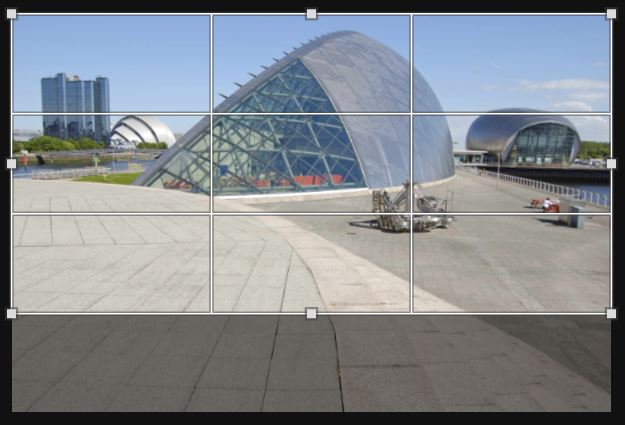
- Click the 'Apply' button (sits over at the top left)

6. Save your image
- To save your image, select File from the top menu and Export
- Select JPEG from the top of the window which opens

7. Optimise your image for use on the web
Move the Quality slider to between 30 and 40 then select Export and save the file to your desired folder

8. Upload to T4
The image is now ready to be uploaded to the T4 media library for use on your web pages. Please check the t4 training on MyPlace for guidance on how to upload to the t4 media library correctly.